Setting up a Yoho Mobile eSIM on your iPhone might sound complicated, but it’s actually pretty easy. No tech degree or screwdriver required. Tap here, scan a code there, and your phone connects like magic (but really, it’s just good tech).
For full steps, tips, and screenshots, check out our full article; it’ll walk you through it all and save you time.
Is Your iPhone Compatible with Yoho eSIM?
Before you start, make sure your iPhone is ready to go. Here’s what you need to have in place before activating your Yoho eSIM:
- Your iPhone is unlocked
- You’re connected to Wi-Fi or mobile data
- You have a Yoho account, and your activation QR code or manual info
To use Yoho eSIMs, your iPhone needs to support eSIM technology and be carrier-unlocked. Not all iPhones are compatible with eSIM, so it’s essential to confirm this before trying to set it up. You can check if your iPhone is compatible by going to Settings > General > About and looking for the “Digital SIM” or “Available SIM” section. If you see that, your device is ready to use Yoho Mobile.
iPhones with eSIM Support
iPhones with Dual SIM (nano-SIM + eSIM):
- iPhone XR
- iPhone XS and iPhone XS Max
- iPhone 11, 11 Pro, and 11 Pro Max
- iPhone SE (2nd generation, 2020)
- iPhone SE (3rd generation, 2022)
- iPhone 12, 12 mini, 12 Pro, and 12 Pro Max
- iPhone 13, 13 mini, 13 Pro, and 13 Pro Max
- iPhone 14 and later support eSIM. U.S. versions have no physical SIM tray and are eSIM-only, while international versions include both eSIM and nano-SIM slots.
iPhones with eSIM Only (No physical SIM slot — U.S. models only):
- iPhone 14, 14 Plus, 14 Pro, 14 Pro Max (U.S. versions only)
- iPhone 15, 15 Plus, 15 Pro, 15 Pro Max (U.S. and some other regions)
iPads with eSIM Support
These cellular-enabled iPads support eSIM (must be Wi-Fi + Cellular model):
- iPad Pro 12.9-inch (3rd generation and newer)
- iPad Pro 11-inch (1st generation and newer)
- iPad Air (3rd generation and newer)
- iPad (7th generation and newer)
- iPad mini (5th generation and newer)
Apple Watches with eSIM (for Cellular Models)
Apple Watch models with GPS + Cellular support eSIM (via the built-in eSIM):
- Apple Watch Series 3 (GPS + Cellular)
- Apple Watch Series 4 through Series 9 (GPS + Cellular)
- Apple Watch SE (1st and 2nd generation – GPS + Cellular)
- Apple Watch Ultra and Ultra 2
Important Requirements
- Your device must be carrier-unlocked.
- Your carrier or eSIM provider must support eSIM activation on your model.
- For iPhones, check compatibility by going to:
- Settings > General > About
- Look for "Digital SIM" or "Available SIM"
- Under "Carrier Lock," it should say "No SIM restrictions"
For a comprehensive list of compatible devices, visit Yoho Mobile’s official eSIM compatibility page.
Real-Life Tip: Don’t Skip This Step
Before installing your Yoho Mobile eSIM, it’s important not to skip a crucial step: making sure your iPhone isn’t restricted by carrier or region.
Many people assume that newer iPhones automatically work with eSIMs, but that’s not always true. Some devices are locked to a specific carrier, which means they can only use eSIMs from that provider. Others, especially those sold in certain countries, may have eSIM functionality disabled entirely.
To avoid problems like failed installations or no service while traveling, check that it’s fully unlocked. You can verify this by going to Settings > General > About. Under “Carrier Lock,” it should say “No SIM restrictions.” You should also see an IMEI number listed under “Digital SIM” or “Available SIM.” If either of these is missing, your device may not be ready for eSIM use.
For a full list of compatible iPhones and regional limitations, visit Apple’s official eSIM support page.
Test Before You Commit to Yoho Mobile
Before purchasing a Yoho Mobile eSIM, it’s a good idea to test if your device works well with the service. Yoho offers a free eSIM trial so you can test compatibility and network performance without any cost. This trial lets you see if your phone can download, install, and activate an eSIM, and if mobile data works in your area or where you’re planning to go.
Just visit the Yoho Mobile Free eSIM Trial Guide and follow the steps to set it up. It’s a simple way to make sure everything works before you commit. Plus, it helps you get familiar with how eSIMs work. Once you’re ready to buy, use code YOHO12 at checkout to get 12% off all purchases.
What to Do If Your iPhone Isn’t Compatible
If your iPhone isn’t compatible with eSIM or is locked to a specific carrier, there are still several ways to stay connected while traveling.
For older iPhone models like the iPhone 8, 7, or 6, which don’t support eSIM, you can use a physical SIM card from a local carrier at your destination or order an international SIM before your trip.
If you travel frequently or want to manage multiple data plans, you might consider upgrading to a newer iPhone. Models starting with the iPhone XR, XS, and SE (2nd generation) support eSIM.
If none of these options work for you, a portable Wi-Fi or a hotspot connection are useful alternatives.
How to Activate Your Yoho eSIM on iPhone
Before you start, make sure you have:
-
A stable internet connection (Wi-Fi or mobile data)
-
A Yoho Mobile account (you can create one on their website)
-
The activation info (QR code or manual details, usually sent by email or found in your account)
Option 1: Use the Yoho Mobile App
- Open the Yoho Mobile app and log in to your account
- The app will automatically install the eSIM—no QR code or manual setup needed
- Once added, your eSIM will show up under Settings > Cellular > Cellular Plans
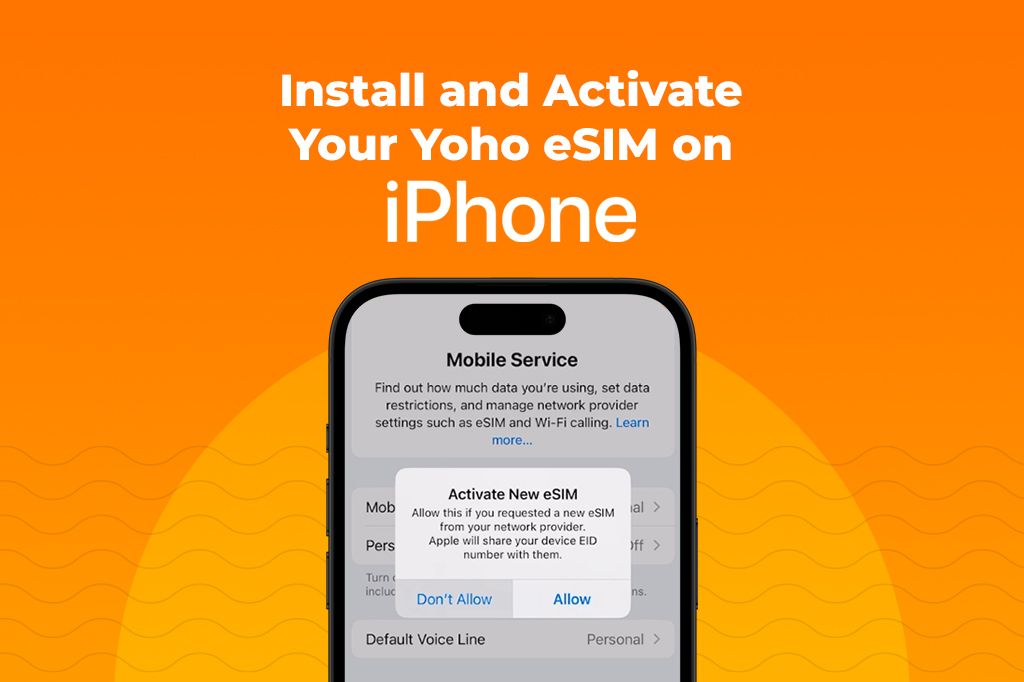
Option 2: Scan a QR Code
- Open Settings on your iPhone
- Tap Cellular (or Mobile Data) > Add Cellular Plan
- Use your camera to scan the QR code from Yoho
- Enter the confirmation code if prompted
- Wait for your eSIM to be activated and added
Option 3: Enter Details Manually
- Go to Settings > Cellular > Add Cellular Plan
- Tap Enter Details Manually
- Enter the SM-DP+ address and activation code provided by Yoho
- Tap Next and follow the prompts to finish setup
- Confirm your new plan appears under Cellular Plans
Troubleshooting Yoho eSIM Activation on iPhone
If your Yoho eSIM won’t activate on your iPhone, here’s what to check and do.
How to Fix a QR Code That Won’t Scan:
- Make sure the QR code hasn’t already been used.
- Clean your camera lens and try again.
- If it still fails, manually enter the SM-DP+ address and activation code (Yoho provides this).
How to Fix No Network After eSIM Activated:
- Turn your iPhone off and on again.
- Go to Settings > Cellular > Cellular Data Options > turn on Data Roaming.
- Reset network settings: Settings > General > Transfer or Reset iPhone > Reset > Reset Network Settings.
- Check if the APN settings need to be manually added (Yoho support can provide them).
How to Fix eSIM Isn’t Showing Up:
- Make sure your iPhone supports eSIM and is carrier-unlocked.
- Ensure your device has the latest iOS update: Settings > General > Software Update.
- Try deleting unused eSIMs: Settings > Cellular > Cellular Plans > tap the ones you don’t need > Delete.
- Then try reinstalling the eSIM.
How to Fix You Have Multiple eSIMs and It’s Not Working:
- Remove any extra or old eSIM profiles that you’re not using.
- Go to Settings > Cellular > Cellular Plans > Delete the extras.
- Restart your phone and re-select the Yoho eSIM as the active line.
How to Fix Manually Entered Code Isn’t Working:
- Double-check the SM-DP+ address and activation code for typos.
- Make sure you’re connected to Wi-Fi when activating.
Still Not Working? Contact Yoho Mobile support. Have this info ready:
- Your iPhone model
- iOS version
- A description of the issue
- Screenshots of any error messages (if possible)
This guide was compiled using Apple’s official eSIM documentation, testing with real Yoho Mobile eSIMs, and feedback from frequent international travelers. For direct support, visit Yoho Mobile Help or consult Apple’s eSIM resource.
Tips for Managing Multiple eSIM Profiles on Your iPhone
-
Switch Between eSIMs Quickly with Profile Shortcuts: If you often switch between eSIMs, you can save time by creating shortcuts. On iPhones with iOS 16 or later, you can make custom shortcuts for switching profiles. Set one up for each eSIM so you can change profiles with a single tap instead of going through settings every time.
-
Save Battery by Deactivating Unused eSIMs: When you have multiple eSIMs active, your phone may use more battery. If you’re not using a certain eSIM, turn it off in Settings > Cellular. This is especially helpful when you’re traveling and only need one active plan.
-
Use Separate eSIMs for Work and Personal: You can set up separate eSIMs for work and personal use. Label them (like “Work” and “Personal”) and choose which one you want to use for calls, texts, or data. This helps you keep your work and personal communication separate and easier to manage.
-
Keep eSIM QR Codes Safe: If you lose your eSIM QR code or activation info, you’ll have trouble reinstalling it. Save your activation QR code in a secure place, like a password manager or an encrypted cloud folder. This way, you’ll have them ready if you ever need to set up your eSIM again, especially useful while traveling.
-
Turn Off Roaming to Avoid Extra Charges: When you’re abroad, you can accidentally rack up roaming charges. To prevent this, go to Settings > Cellular and turn off roaming on your home SIM. Ensure data roaming is enabled only for your Yoho eSIM if required by the local network. You can also set data usage alerts in Settings to get notified before you reach your limit.
-
Set Data Limits for Each eSIM Profile: To avoid overusing your data, set data limits for each eSIM profile directly in Settings > Cellular > Cellular Data Usage. Some providers, like Yoho, also let you monitor usage in their app. This helps you stay on top of how much data you’ve used and avoid surprise charges, especially useful if you’re using multiple eSIMs while traveling.
-
Label eSIM Profiles for Easy Identification: Give each eSIM a clear name like “Home” or “Travel” so you can tell them apart. You can do this in Settings > Cellular. Having clear labels makes it easier to switch between plans without picking the wrong one.
-
Preload eSIMs Before You Travel: Before your trip, download and install local eSIMs for the countries you’ll visit. Do this at least a week in advance so you can test that everything works. For example, you can install a European eSIM before your flight, then activate it as soon as you land. This saves time and keeps you connected without needing to buy a SIM at the airport.
FAQs About Yoho eSIM Activation on iPhone
Do I need to remove my physical SIM to use Yoho eSIM?
No, you don’t need to remove your physical SIM. Your iPhone can use both a physical SIM and Yoho eSIM at the same time. You can manage which one is used for calls or data through your phone’s settings.
Can I have multiple eSIM profiles on my iPhone?
Yes, your iPhone can store multiple eSIM profiles, though only one or two can be active at a time. Newer models (iPhone 13 and later) can use two active eSIMs, while older models support only one.
What happens if I switch eSIM carriers?
If you switch carriers, you can deactivate your current Yoho eSIM and activate the new carrier’s eSIM. You may need to scan a new QR code or enter activation details for the new carrier. Ensure your device is unlocked and compatible with the new carrier.
How long does Yoho eSIM activation take?
Yoho Mobile eSIM activates within 5-15 minutes, but it can take up to 24 hours if there are delays. Make sure your device is connected to the internet, and follow the setup instructions. If it takes longer than expected, try restarting your phone.
Can I use Yoho eSIM with all carriers?
Yoho eSIM works on all unlocked, eSIM-compatible iPhones, but not all carriers support eSIM. Make sure your device supports eSIM and check if your carrier is compatible.
Can I switch back to a physical SIM after activating Yoho eSIM?
Yes, you can switch back to a physical SIM. To do so, deactivate the Yoho eSIM in your iPhone’s settings, insert your physical SIM, and follow the carrier’s reactivation process. Some carriers may require you to contact them if the SIM was deactivated when you switched to eSIM.